All that is needed to drive automation from specifications is at least one more specification.
In the previous post we used the REPL console in gwen-web to interactively complete the floodio challenge one step at a time. In this post we will use a lot of the same steps again but will automate the entire challenge through a feature file instead. Like before, there will be no need to compile any code. But unlike before, we will introduce some custom steps and compose step definitions for those in a meta file. Before proceeding, be sure to install gwen-web if you have not done so already and open a command prompt to your installation directory.
Writing the Feature
Features should be self documenting.
We start by writing a FloodIO.feature file containing the content shown below. For convenience, create this file in the root of your gwen-web installation. You can use any plain text editor you like. This will be the feature specification that we will use to automate the challenge.
   Feature: Complete the floodio challenge
       As a gwen user
       I want to automate the floodio challenge
       So that I can verify that it works

  Scenario: Launch the challenge
      Given I launch the floodio challenge
       Then I should be on the start page

  Scenario: Complete step 1
      Given I am on the start page
       When I click the Start button
       Then I should be on the step 2 page

  Scenario: Complete step 2
      Given I am on the step 2 page
       When I select "21" in the how old are you dropdown
        And I click the next button
       Then I should be on the step 3 page

  Scenario: Complete step 3
      Given I am on the step 3 page
       When I select and enter the largest order value
        And I click the next button
       Then I should be on the step 4 page

  Scenario: Complete step 4
      Given I am on the step 4 page
       When I click the next button
       Then I should be on the step 5 page

  Scenario: Complete step 5
      Given I am on the step 5 page
       When I enter the one time token
        And I click the next button
       Then I should be on the challenge completed page
The above specification consists of a feature declaration followed by several scenarios. The feature declaration is merely documentation. It has a name followed by a narrative. Each scenario has a name and a sequence of steps. If you look carefully you will discover that the steps in the feature are not the same set of steps we previously used to complete the challenge in the REPL. There are several reasons for this:
- We are writing the feature first and want it to read well.
- We are grouping steps into scenarios.
- We expect that all steps will execute one after the other in rapid succession when sourced from a feature file. In the REPL, pages had plenty of time to load between manually entering steps. But in batch mode we will not get any free page loading time between steps. We therefore have to introduce additional steps that will explicitly wait for pages to load before subsequent steps interact with those pages.
Writing the Meta
We are now ready to identify and compose the custom steps we have introduced. The easiest way to do this is to launch the feature and define a step definition for every step that fails to execute because it is undefined, and then repeat the process until there are no more undefined steps. We start using that approach now and issue the following command in the root of our gwen-web installation to launch the feature in batch mode (using the -b option). Batch mode forces the Gwen session to exit as soon as the feature exits.
Windows:
gwen -b FloodIO.feature
Mac:
./gwen -b FloodIO.feature
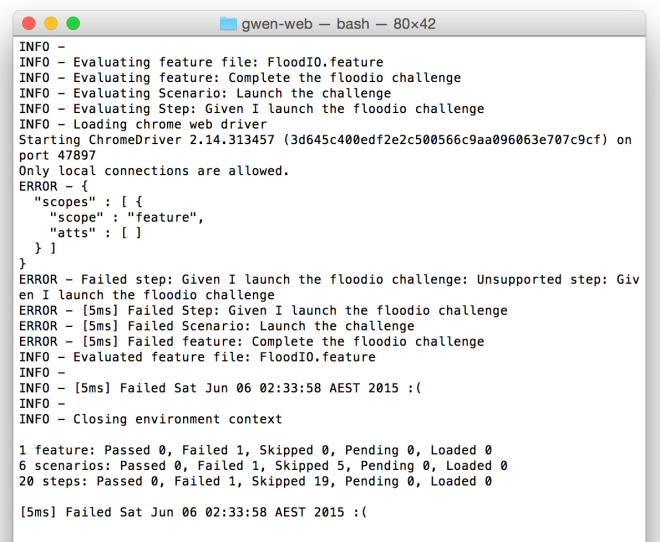
The output shows that the first step fails:
ERROR - Unsupported step: Given I launch the floodio challenge
This error reports that an unsupported step has been found and identifies which one it was. We can be sure now that this is a custom step and so immediately compose a step definition for it. To do this, create a new file called FloodIO.meta in the root of your gwen-web installation (alongside the feature file) and update it with the following content. Again, use any plain text editor you like.
   Feature: floodio meta

  @StepDef
  Scenario: I launch the floodio challenge
      Given I navigate to "https://challengers.flood.io/start"
Notice that we composed this new step definition by simply declaring a Scenario that:
- Is annotated with the @StepDef tag
- Has the name ‘I launch the floodio challenge‘. Note that the ‘Given’ keyword prefix is omitted from this name.
- Contains one step that launches the browser and navigates to the challenge url.
The above step definition contains only a single step. This effectively makes ‘I launch the floodio challenge‘ an alias for ‘I navigate to https://challengers.flood.io/start‘. This may not seem very useful but what it does do in this instance is externalise the URL to the meta file. The URL is considered configuration data and therefore should be in the meta file and not the feature file.
Now when this meta is loaded, the bound navigation step will execute whenever ‘I launch the floodio challenge‘ is referenced by a step running in the interpreter.
The ‘When’, ‘Then’, ‘And’, or ‘But’ keywords would also work in place of the ‘Given’ keyword in the calling step. Which keyword you use is up to you, but you should consider both fluency and context when authoring your own features.
Next, we launch the feature again to confirm that the step now works. But this time we do it in interactive mode (without using the -b option) so that the browser remains open and the REPL mode starts after the feature exits.
Windows:
gwen FloodIO.feature
Mac:
./gwen FloodIO.feature
Gwen will automatically find the meta file if it is in the same directory as (or somewhere in the path of) the feature file. If you saved the meta somewhere else, then you can specify its location using the
-moption.
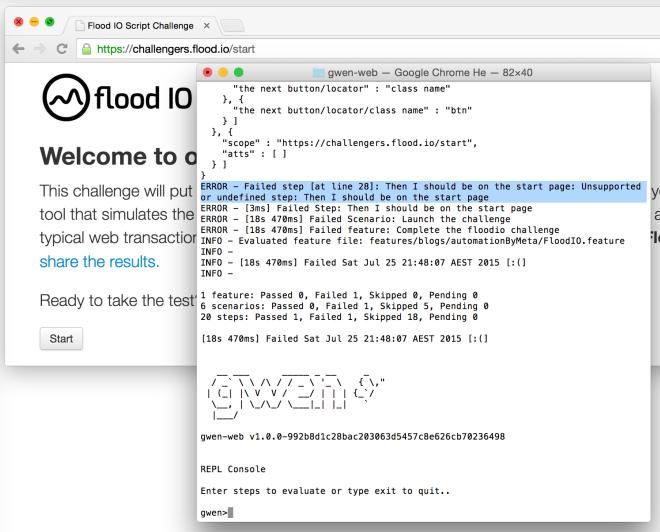
The step we just composed now works and its output looks good. The start page has loaded in the browser and the console has reported a ‘Passed’ status for it. But now we get an undefined error on the next step:
ERROR - Failed step [at line 28]: Then I should be on the start page:
Unsupported or undefined step: Then I should be on the start page
So we proceed to define this step in our meta file as follows:
   Feature: floodio meta

  @StepDef
  Scenario: I launch the floodio challenge
      Given I navigate to "https://challengers.flood.io/start"

  @StepDef
  Scenario: I should be on the start page
      Given I wait until "$('h1').text().trim() == 'Welcome to our Script Challenge'"
       Then I am on the start page
        And the heading can be located by tag name "h1"
        And the heading should be "Welcome to our Script Challenge"
        And the Start button can be located by name "commit"
As before, we defined this step definition as a Scenario and annotated it with the @StepDef tag, but this time we named it ‘I should be on the start page‘ and bound five steps to it:
- The first step waits for the javascript predicate “
$('h1').text().trim() == 'Welcome to our Script Challenge'” to return true. We consider the start page to be loaded when the heading is rendered in the browser. Simply checking the heading is sufficient in this case, but other pages on other sites could require more sophisticated checks. It’s up to you to discover what constitutes a page load and tailor a suitable predicate to match. - The second step puts the start page in scope
- The third step defines the locator binding for the heading
- The fourth step checks that the rendered heading content is what we expected. Although the predicate in the first step already does this, it is good practice to always check the heading (or some other text) on every page after it loads regardless. It just so happens in this instance that the predicate checks the same heading. But this will not always be so.
- The fifth step defines the locator binding for the Start button
We now type exit in the previous Gwen session to close it and launch the feature again to confirm that the above works.
Windows:
gwen FloodIO.feature
Mac:
./gwen FloodIO.feature
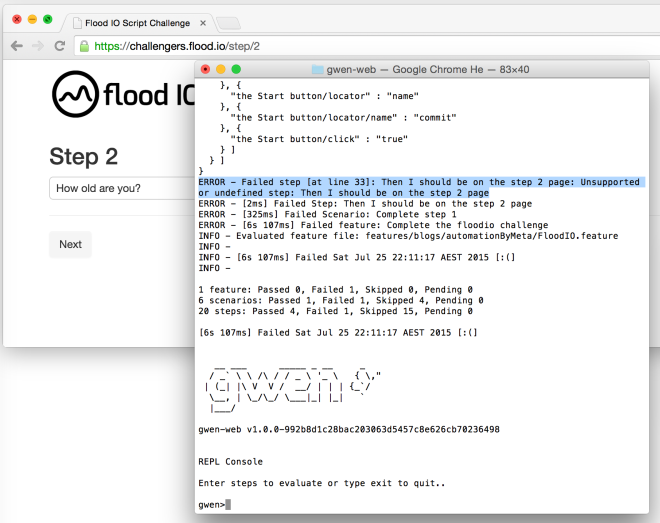
We observe from the output that the custom step does work and that we have progressed beyond the first page and have made it to the second page of the challenge in the browser. We also observe that the following two steps executed successfully:
Given I am on the start page
 When I click the Start button
This is because these are not custom steps, but rather predefined steps in gwen-web. The embedded web engine in the interpreter knows how to execute them without us having to do anything. But we do again fail with a similar error to the one we got last time on the custom step that follows.
ERROR - Failed step [at line 33]: Then I should be on the step 2 page:
Unsupported or undefined step: Then I should be on the step 2 page
The Completed Meta
Repeating the process for the remaining custom steps (and doing some refactoring as we go to eliminate redundancies) yields the complete meta specification below. Most of the steps in this meta are borrowed from the previous post. We simply bound them here to step definitions and mapped them by name to the custom steps in our feature.
   Feature: floodio meta

  Scenario: Initialise
      Given the heading can be located by tag name "h2"
        And the next button can be located by class name "btn"

  @StepDef
  Scenario: I launch the floodio challenge
      Given I navigate to "https://challengers.flood.io/start"

  @StepDef
  Scenario: I should be on the start page
      Given I wait until "$('h1').text().trim() == 'Welcome to our Script Challenge'"
       Then I am on the start page
        And the heading can be located by tag name "h1"
        And the heading should be "Welcome to our Script Challenge"
        And the Start button can be located by name "commit"

  @StepDef
  Scenario: I should be on the step 2 page
      Given I wait until "$('h2').text().trim() == 'Step 2'"
       Then I am on the step 2 page
        And the heading should be "Step 2"
        And the how old are you dropdown can be located by id "challenger_age"

 @StepDef
  Scenario: I should be on the step 3 page
      Given I wait until "$('h2').text().trim() == 'Step 3'"
       Then I am on the step 3 page
        And the heading should be "Step 3"
        And the largest order value is defined by javascript "Math.max.apply(Math, $.map($('.radio'), function(x) { return parseInt($(x).text()); }))"
        And the largest order input field can be located by id "challenger_largest_order"
        And the largest order radio button can be located by javascript "$('.radio:contains(${the largest order value}) input').get(0);"

  @StepDef
  Scenario: I should be on the step 4 page
      Given I wait until "$('h2').text().trim() == 'Step 4'"
       Then I am on the step 4 page
        And the heading should be "Step 4"

  @StepDef
  Scenario: I should be on the step 5 page
      Given I wait until "$('h2').text().trim() == 'Step 5'"
       Then I am on the step 5 page
        And the heading should be "Step 5"
        And the one time token can be located by css selector ".token"
        And the one time token field can be located by id "challenger_one_time_token"

  @StepDef
  Scenario: I should be on the challenge completed page
      Given I wait until "$('h2').text().trim() == 'You're Done!'"
       Then I am on the challenge completed page
        And the heading should be "You're Done!"

  @StepDef
  Scenario: I select and enter the largest order value
      Given I type the largest order value in the largest order input field
        And I click the largest order radio button

  @StepDef
  Scenario: I enter the one time token
      Given I wait for the one time token text
        And I type the one time token in the one time token field
Conclusion
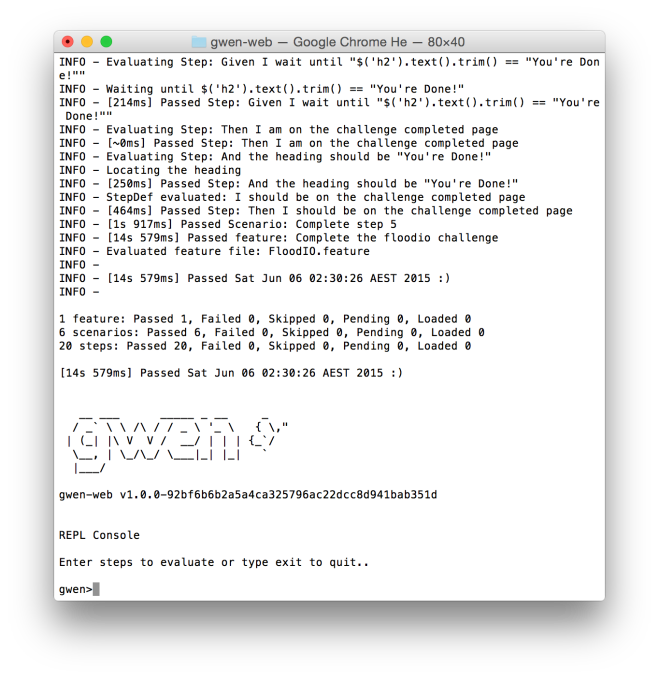
With the meta complete and all custom steps resolved, we now have a fully executable feature file for automating the floodio challenge. We did this by writing the feature specification first and composing the meta specification second to make the feature executable “as is” (without modifying it whatsoever). Launching the feature should now always result in success, unless something has changed in the application or it suddenly goes offline.
Windows:
gwen -b FloodIO.feature
Mac:
./gwen -b FloodIO.feature
Reports
If you want to also generate reports:
Windows:
gwen -b -r target\reports FloodIO.feature
Mac:
./gwen -b -r target/reports FloodIO.feature
A HTML report will be available at target/reports/index.html.
Tips
The approach presented here can be used to automate any web application and works consistently well across the four major browsers. The core tips for doing it right include:
- Composing a custom step that will take you to the entry point of the application. The step definition for this should include all the necessary steps to get you there.
- Composing custom wait steps for each page. For any given page, you must first wait for that page to load through an appropriately tailored JavaScript predicate before putting the page in scope, binding its locators, and performing actions and assertions on it.
- Creating all conditions and asserting all expectations for completeness.
Next Time
In the next post we will look at properties and see how they can be used to bind environment and user data.
Update – 16 July 2015
See configurable user properties with gwen-web.


One thought on “Automation By Meta”